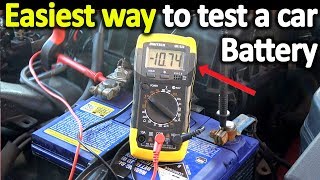
How to Test a Car Battery [Both Digital & Analog]
Channel: 4DIYers
Category: Autos & Vehicles
Tags: battery testlead acidagmhow to test a truck batterytruckmultimeterbattery chargerbatteryhow to test a car batteryautomotive batterytesting a car batteryalternator testingload testtractortroubleshootcar batteryhow to load testlawnmowerauto batteriescar battery load testerhow to test4diyersvoltagecar battery voltageconditioncar battery chargertesting car battery with multimeter12vtesting car batteryfree battery testing12 volt
Description: How to test the condition of your vehicle’s #battery. Typically a car battery will last anywhere from 3 to 5 years, sometimes even longer depending on its use, climate, quality, etc. A worn or faulty battery will cause no starts, engine turning over slow especially in cooler weather, battery discharging quickly, electrical malfunctions in your vehicle, and possibly a warning light on your gauge cluster. #howto #OEMTOOLS 24359 battery analyzer: mobiledistributorsupply.com/24359-digital-battery-analyzer-oem Website: 4diyers.com Patreon: patreon.com/4diyers Facebook: facebook.com/4diyers Twitter: twitter.com/4DIYers Instagram: instagram.com/4diyers Tumblr: 4diyers.tumblr.com Pintrest: pinterest.com/4diyers Tools/Supplies Needed: -wrench set or socket and ratchet set -digital or analog battery analyzer Chapters: 00:00 Intro 00:44 Battery Location & Removal 00:47 Common Fault Symptoms 02:00 Testing Voltage 02:33 Battery Sizing 03:03 Digital Battery Analyzer 04:59 Analog Battery Tester Procedure: Located the battery in your vehicle, typically they’re found under the hood but can be in other locations such as under the rear seat or trunk area. Disconnect the battery terminals using the appropriate tools, start with the negative terminal first to reduce the chance of a short when using your tools. Once the negative clamp has been removed, then move onto the positive. Remove the hold-down clamp, styles will vary. Remove the battery, keep it level as you may risk spilling acid out of the vent hole, this can cause damage to your vehicle, clothing, or harm to you. Before testing the battery, we’ll need to ensure it has a good charge. Using a multi-meter, set it to the two-digit dc voltage setting, touch the appropriate probes on the negative and positive terminals. A fully charged battery would be 12.7 to 13.2 volts. A completely dead or discharged battery would see a voltage of 11.9 or lower. With this battery being at 11.6 volts, I’ll have to charge it to get an accurate test. Determine the CCA or cold cranking amps of the battery. Each vehicle, will require a certain sized battery, beyond exterior dimensions, cold cranking amps is a factor used. For this battery, it’s 875 CCA and this can be found on the informational tags on the top or side. Cold-cranking amps are defined as how many amps a battery can supply in a cold-weather climate, this would be based on a temperature of -18C or 0F. Using a digital battery analyzer, connect the negative and positive clamps to the correct battery terminals. Red for positive, and black for negative. The screen will immediately illuminate and it’ll show the battery’s current charge, right now it’s above 13 volts as I had it on charge a few minutes ago. Select the battery test from the menu selection. Select the type of battery you’re testing, for this we’re testing a regular liquid battery. Next, select the SAE battery rating. Now is entering the cold cranking amp rating, this is the number on the information tag that was shown earlier in the video. Finally enter again and the analyzer will perform a test on the battery. The final result is a faulty battery. The battery is only able to provide 566 cold-cranking amps at its current charge. State of health is 64%. And the state of charge is 100%. Internal resistance is 6.36 milliohms. Resistance does have importance in a battery, the older a battery becomes, the more resistance it may have and this would indicate it’s coming to the end of its life cycle. But resistance does vary, based on the construction of a battery from new, number of plates, and even temperature. Using an analog tester, this has an element inside, when a load is placed on the battery, this element heats up and you can sometimes feel this through the vents on the case. The switch is used to activate the test, hold it for 10 seconds and monitor the gauge. Connect the clamps on the appropriate battery posts just like before. Black for negative, red for positive. Here we can see a current voltage. It’s just under 13 volts using the needle and scale at the top of the gauge. Now pressing the switch, this is a momentary switch so you’ll need to hold it in place for about 10 seconds. Monitor the needle, it’ll most likely drop. With the battery being 875 cold-cranking amps, watch the needle reference in the green stepped 900 section value. The needle does drop and you can see it’s falling into the yellow section, meaning the battery is on the weaker side. Thank you to all those who watch my videos and support my content. Don't forget to subscribe to my channel for future tutorial videos and like my video if you found it helpful. New videos are always being uploaded every week! © 4DIYers 2013 All Rights Reserved No part of this video or any of its contents may be reproduced, copied, modified or adapted, without the prior written consent of the author.